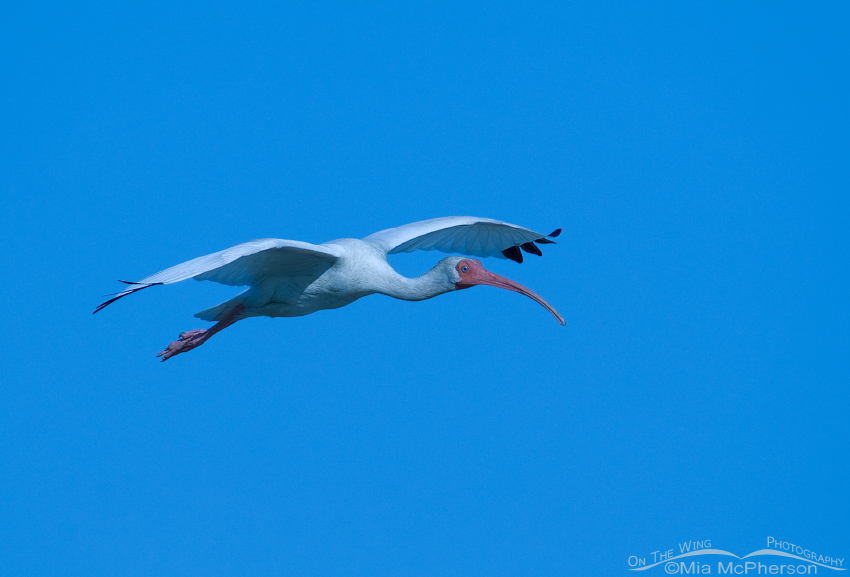
 Adult White Ibis (Eudocimus albus) in flight – tungsten WB version – Nikon D200, f6.3, 1/1000, ISO 160, Nikkor 80-400mm VR at 400mm, natural light (sort of)
Wow, did I mess up the white balance on the image above. I am almost ashamed to put this image into this post but I thought someone might learn from my mistakes.
A few things about my white balance settings before I go on to explain the tungsten blue mess I created above.
-
For the most part I use Auto White Balance for my white balance mode on my Nikon D200 (OK, almost always)
-
I find that using auto white balance most often gives me the color tones I saw when creating the image
-
I do on occasion change my white balance (on purpose) if I feel I need to due to lighting conditions.
But I do screw up on occasion. On the day I took the White Ibis image above the action had been hot and heavy earlier in the morning and I am not sure when it happened but some how when I was changing settings for my ISO I must have fumbled with my fingers and also changed the white balance from auto to “tungsten”. I’m usually fairly confident about my exposures so I wasn’t looking at the LCD when the image previews came up on the screen. I was paying attention to my shutter speed and aperture while looking through the viewfinder but wasn’t looking at the control panel on the top of my D200 or I might have noticed that I wasn’t using auto white balance.
Live and learn though. I drove home, uploaded my images to my computer and began to preview them for culling. When I came across the first image after the white balance change I wondered what the heck had happened!
All I can say at this point is that I am very glad I shoot all of my images from my DSLRs in RAW format because I was easily able to get the white balance to where it needed to be to so that the image looked like the scene I saw through my viewfinder in ACR (Adobe Camera Raw).

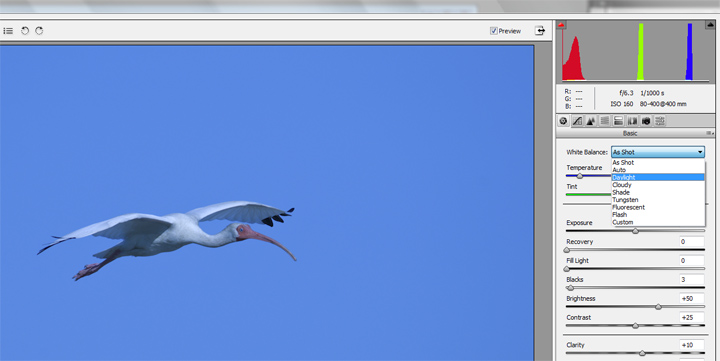
Screen shot of ACR white balance adjustment tool
In ACR’s first screen on the right hand side there is a drop down next to “White Balance” where you can select different white balances. For my ibis image I selected “Daylight” because that gave me the look of the frame I remember seeing through my view finder. Additionally you can use the “Temperature” slider, going left towards darker blue adds cooler temps, going right in the yellows adds warmer tones.
Yes, I messed up the white balance on my Ibis image but ACR helped me to correct it and I didn’t have to delete the file.
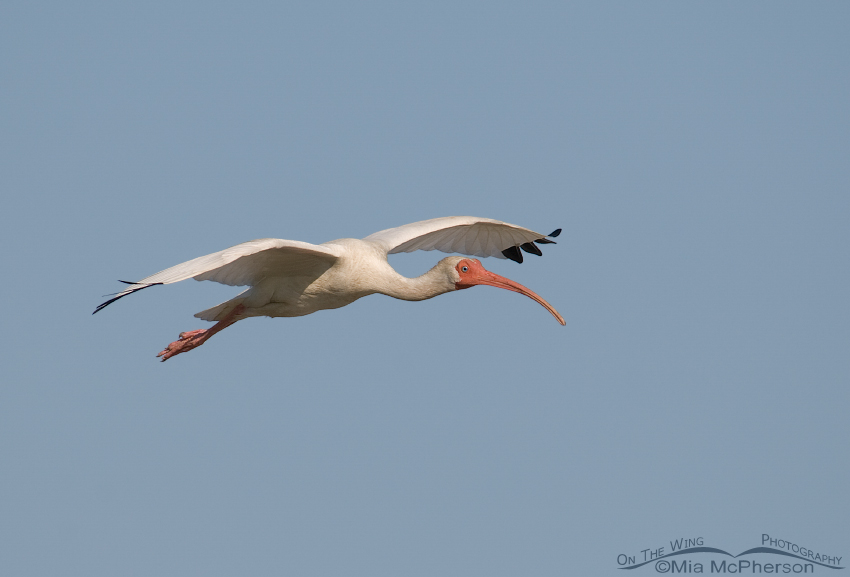
 Adult White Ibis (Eudocimus albus) in flight – corrected WB version – Nikon D200, f6.3, 1/1000, ISO 160, Nikkor 80-400mm VR at 400mm, natural light
The image above more accurately represents the color of the ibis and the sky on the day I created this photo. The whites don’t have a unnatural blue cast and the sky is no longer a garish, unbelievable blue. The whole image has been improved by simply and easily adjusting the white balance.
After my experience with screwing my white balance up that day I had to make a note to myself to remember to check my white balance setting on the camera. And I don’t feel nearly as silly for messing it up in the first place.
Life is good.
Mia
Click here to see more of my White Ibis photos plus facts and information about this species.

PS: I edit all of my images in Photoshop I don’t know how to correct white balance in Lightroom or any other photo editing programs.


As an accomplished photographer one might not expect these “simple” mistakes to occur, but as your post indicates, it can and does. The take away here for me is that we often do things we’re not aware of while “in the moment”, so it pays to constantly check one’s settings to insure the results we receive are the ones we intended.
Wonderful post Mia, thanks.