Recently on a nature photography critique site where I am a member a person who is new to photography asked about using auto white balance because in a previous image they had posted some other members had detected a magenta cast while reviewing the photo for critique.
The image that had the magenta cast had also had additional adjustments made to it in post processing by using “auto levels” and “color correction”, it wasn’t just a white balance issue.
I never use auto color correction, I prefer to adjust white balance in ACR and only in extremely rare cases have I ever used auto levels. I’ve selected a photo of a Willet to show why I don’t use auto levels. Not all images will show these extreme differences when applying auto levels.
The three images are all from the same original file, the camera was set to Auto White Balance at the time the file was created, I cropped the image in ACR , brought it into Photoshop, masked the bird and saved it for sharpening as the final step then duplicated it twice to have copies to use for applying auto levels.
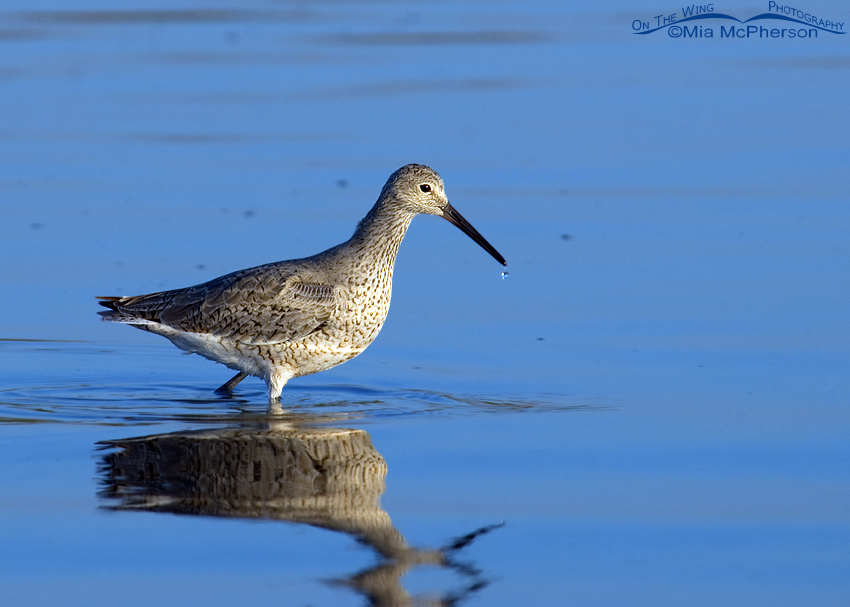
 Willet image using auto levels full strength in Photoshop
The Willet (Tringa semipalmata) image above was processed in Photoshop with full strength auto levels applied to it. The blue of the water is too blue and has a slight magenta cast to it, the darks of the feathers and bill are too dark, the early morning light has been essentially stripped from the image and the image looks completely unnatural.
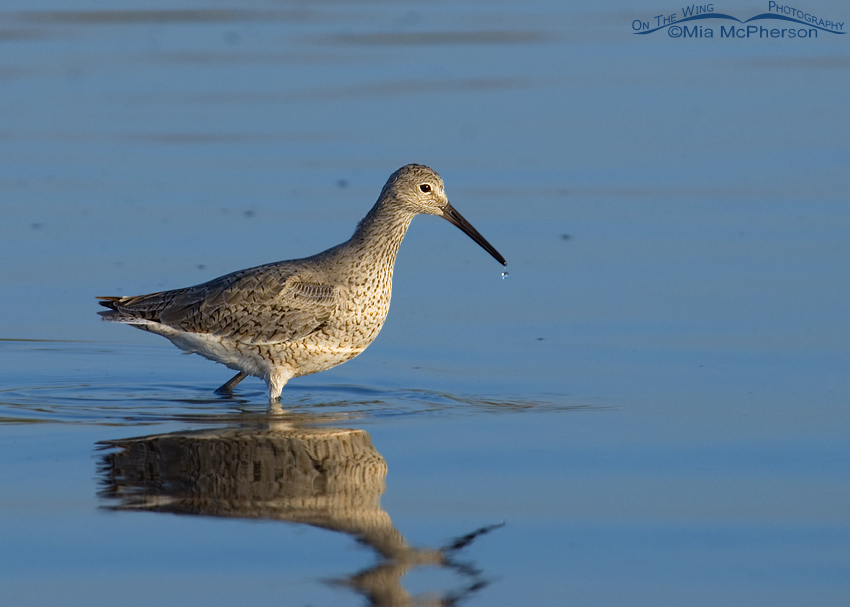
 Willet image using auto levels half strength in Photoshop
For the image above I applied auto levels in Photoshop then using the slider I reduced the auto levels by 50%. The blue of the water looks better than when using auto levels at 100% but it still isn’t the correct color blue. The plumage of the willet looks warmer at 50% strength auto levels than it does at 100% strength but the effect of the early morning light still seems to be lacking. The darks of the bill still appear too dark to my eyes and the photo still has an unnatural feel to it.
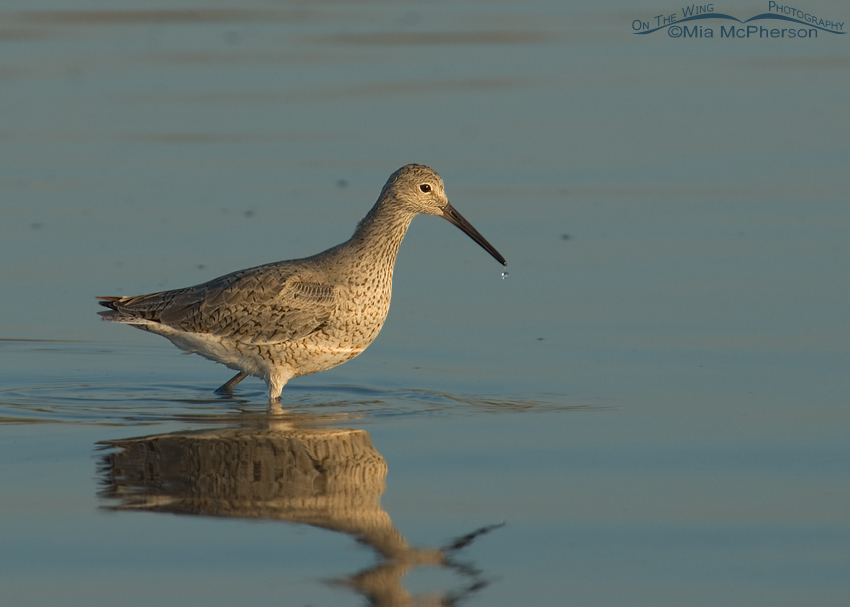
 Willet image without auto levels applied in Photoshop – D200, handheld, f7.1, 1/400, ISO 200, 80-400mm VR at 400mm, natural light
The willet photograph above is a much better representation of the color of the water at the time the image was created, the effect of the warm, early morning light is evident on the water and the willet’s plumage and visually the entire image looks far more natural and appealing.
Auto levels in Photoshop must be used with a light touch. Using auto levels can create too much contrast in an image, can cause color casts, it can brighten an image too much, it can strip the light and can make some images look very unnatural.
Mia
Click here to see more of my Willet photos plus facts and information about this species.

